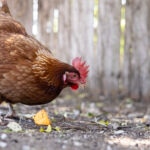
Baby Chicks: Getting Started with Backyard Chickens
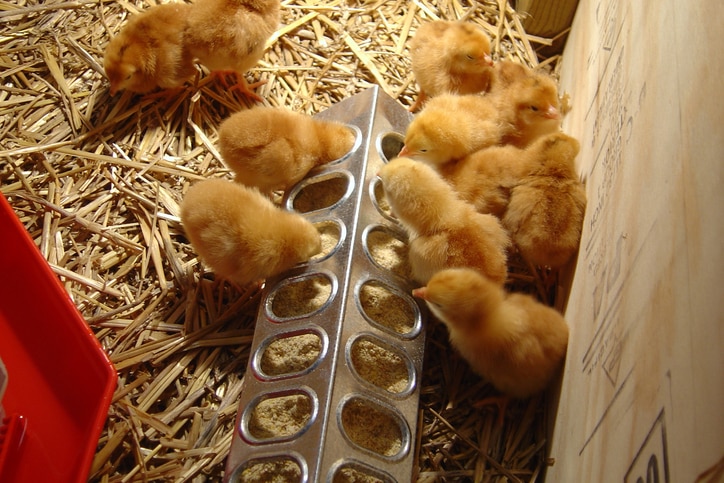
Photo by Jennifer Chamblee / iStock / Getty Images Plus
Chick Days are here!
Every spring around the country, farm, feed, and home stores offer baby chicks for sale. A celebration of all things poultry, Chick Days is a great way to expand your flock or get started with raising backyard chickens. To get the most out of Chick Days, however, it pays to be strategic and know what the event usually includes (and doesn’t).
First, there is no official date for Chick Days. It generally runs from early in the year in the warmest regions all the way through early summer in the colder climates. In most cases, retailers offer mixed breeds, but they generally focus on the most popular types of chickens. And unless they’re specifically marked as sexed pullets, there’s a chance there may be roosters mixed in the batch.
If you’re new to raising chicks, Chick Days is a great opportunity to load up on the supplies you’ll need to be successful, including brooders, waterers, and heaters. Read on to learn more about getting started with chicks—so you can make Chick Days an annual event and enjoy the many benefits of raising backyard chickens for years to come.
Chick Care: The Basics
Raising chicks is a rewarding experience, whether you want to teach your children how to care for animals or simply want to enjoy fresh eggs. Backyard chickens also provide a natural source of pest control and garden maintenance.
Even though raising baby chicks is a relatively straightforward process, there are certain things they will need during the first few weeks. Depending on where you live, be prepared to keep them indoors for several weeks while you monitor their development.
How Long Will Chicks Live Inside?
When you first bring home baby chicks, you’ll need to provide them with a safe, warm place to grow. A manufactured brooder is the most common and best choice. You can make a simple one yourself, or simply purchase one that has been designed to keep your chicks healthy and happy for the first few weeks of their lives. Brooders provide both warmth and a safe environment, protected from other pets and children.
To protect them from the cold, chicks shouldn’t be moved outside until the outdoor temperature is consistently at or above 75°F (even at night!) and the chicks are fully feathered and all of their “down” is gone. In general, this means chicks will live mostly inside for the first 4 to 6 weeks of their lives.
Setting Up Your Chick Brooder
It’s best to have your brooder and supplies set up before you bring your new chicks home. Ideally, you’ll prepare your brooder 48 hours in advance.
In most cases, you want to start with a brooder designed for smaller, newly hatched chicks. As they grow, you can explore moving them into a larger brooder. It’s not advisable, however, to start new chicks in a brooder designed for more mature, larger chicks—the smaller chicks could become stuck in the feeder holes and become injured.
Choosing the Right Brooder
Ultimately, the size of the chicken brooder you need depends on how many baby chicks you will be raising. “A brooder should provide at least 1 square foot per chick at the start but should be expandable as they grow,” says Afshin Zakeri, an avian clinician.
You should also consider how long you plan on keeping the chicks indoors and how large their breed gets.
The specific type of brooder isn’t necessarily a concern, as long as you get one that meets the basic needs of the baby chicks.
“The key during brooding is to limit drafts in the brooding area and provide a heating source, space for the chicks to remove themselves from the heat, fresh air, clean water, and starter food,” says Jessica Hockaday, DVM, Chewy veterinarian.
Brooder Supplies
Aside from choosing the right size of brooder for your chicks, it’s a good idea to have all your supplies handy before the chicks come home, including:
- Bedding: Different types of bedding, such as paper litter, straw, hay, or shavings, can be used to keep chicks warm and clean.
- Feeders/Waterers: Invest in closed watering systems so the chicks do not have access to open water, which can pose a drowning hazard. Look for feeders and waterers that are easy to clean, to keep everything sanitary.
- Heat Source/Thermometer: Infrared lights are recommended for brooding lamps. Red bulbs are used for heat during the brood to allow for the chicks to allow the chicks to rest during the day, while the light is on/heating their area. This type of light provides both warmth and visibility. A thermometer can help you keep an eye on the temperature. Hockaday recommends lowering the temperature by about 5 F each week as chicks are growing.
- Perches: Perches and ramps help to encourage foraging, exercise, and play. Baby chicks need plenty of exercise to help them develop stronger muscles and prepare for the transition outdoors.
Feeding Your Chicks
For about the first eight weeks of their lives, your new chicks will eat a starter diet. Here are some things to consider when choosing the right feed for your chicks:
- Medicated Starter vs. Non-Medicated: Medicated chicken starters contain amprolium, which helps to prevent coccidia, a common intestinal disease in chicks. You may want to choose a medicated starter if your chicks will be in a high-risk environment. However, if they’ve been vaccinated for coccidia or you have a multi-species flock, opt for non-medicated starters. That’s because amprolium, which is the active medication in medicated feed, can be dangerous to ducks at lower doses.
- Supplements: Supplements can be very helpful when raising baby chicks as a way of supporting their overall health as they are developing. Zakeri recommends popular supplement options such as probiotics, electrolytes, vitamins, and apple cider vinegar.
- Chick Grit: Grit is an additive that you may or may not need to give your chicks, depending on the type of feed you are using. “If they are eating anything besides chick starter (e.g., treats or greens), they need chick-sized grit for digestion,” says Zakeri.
Handling Your Chicks
Handling baby chicks can help acclimate them to people—but be careful about how much they’re handled, especially at first, while they’re adjusting to their new environment.
Handling a chick should be done with care, with both hands covering their wings while you support their legs. To protect against the transmission of Salmonella, it is also essential that you wash your hands thoroughly with soap and water before and after handling chicks. Chicks can carry germs that make us sick, and we can introduce germs to make them sick.
Handwashing is an essential part of raising chicks and ensuring the become a healthy adult flock.
Recognizing Sick Chicks
It can be challenging to know if your chicks are sick, since this may not always be obvious. However, there are some behavioral and physical signs to look for that could indicate one or more of your chicks is not feeling well:
- Cuddling/huddling together under the light/heat source is a sign the chicks are too cold
- Coughing, sneezing, or wheezing
- Lack of energy
- Drooping wings, holding head down and closing their eyes
- Loss of appetite
- Nasal discharge
If you see any of these signs or any unusual behavior in general, it’s always a good idea to check with an avian vet or expert in chicken husbandry to ensure your flock continues to thrive.
FAQs
Q: How do I introduce a new chick to an existing flock?
A: Chicks should be at least six to eight weeks old before being introduced to your existing flock. When you are ready, there are a few ways you can safely introduce newer chicks to a flock. The chicks can be kept in a small cage or coop, allowing them to meet the other chickens while still separated, or they could be introduced in a neutral space where there is less territorial aggression.
This content was medically reviewed by Jessica Hockaday, DVM, Chewy veterinarian.